

Scaling an STL file sounds simple, but getting it wrong can ruin a print before it even starts. A model that is too large may not fit the print bed, while a model that is too small may lose detail, become too weak, or simply not work for its intended purpose.
In this guide, we explain how to scale STL files correctly for 3D printing, what mistakes to avoid, and how to check that your model is still printable after resizing. If you need help preparing a file for production, you can use our 3D printing service UK or upload your model directly through our instant quote / upload page.
Scaling an STL file means increasing or decreasing the overall size of a 3D model before printing. This is usually done in slicer software or in 3D modelling software.
When you scale a model, the geometry changes proportionally unless you apply non-uniform scaling. For example, increasing a model to 150% makes all dimensions 1.5 times larger.
There are many reasons to scale a model before printing:
Scaling affects much more than the visible size of a model. It can also affect:
That is why scaling an STL file should never be treated as a random slider move followed by hope.
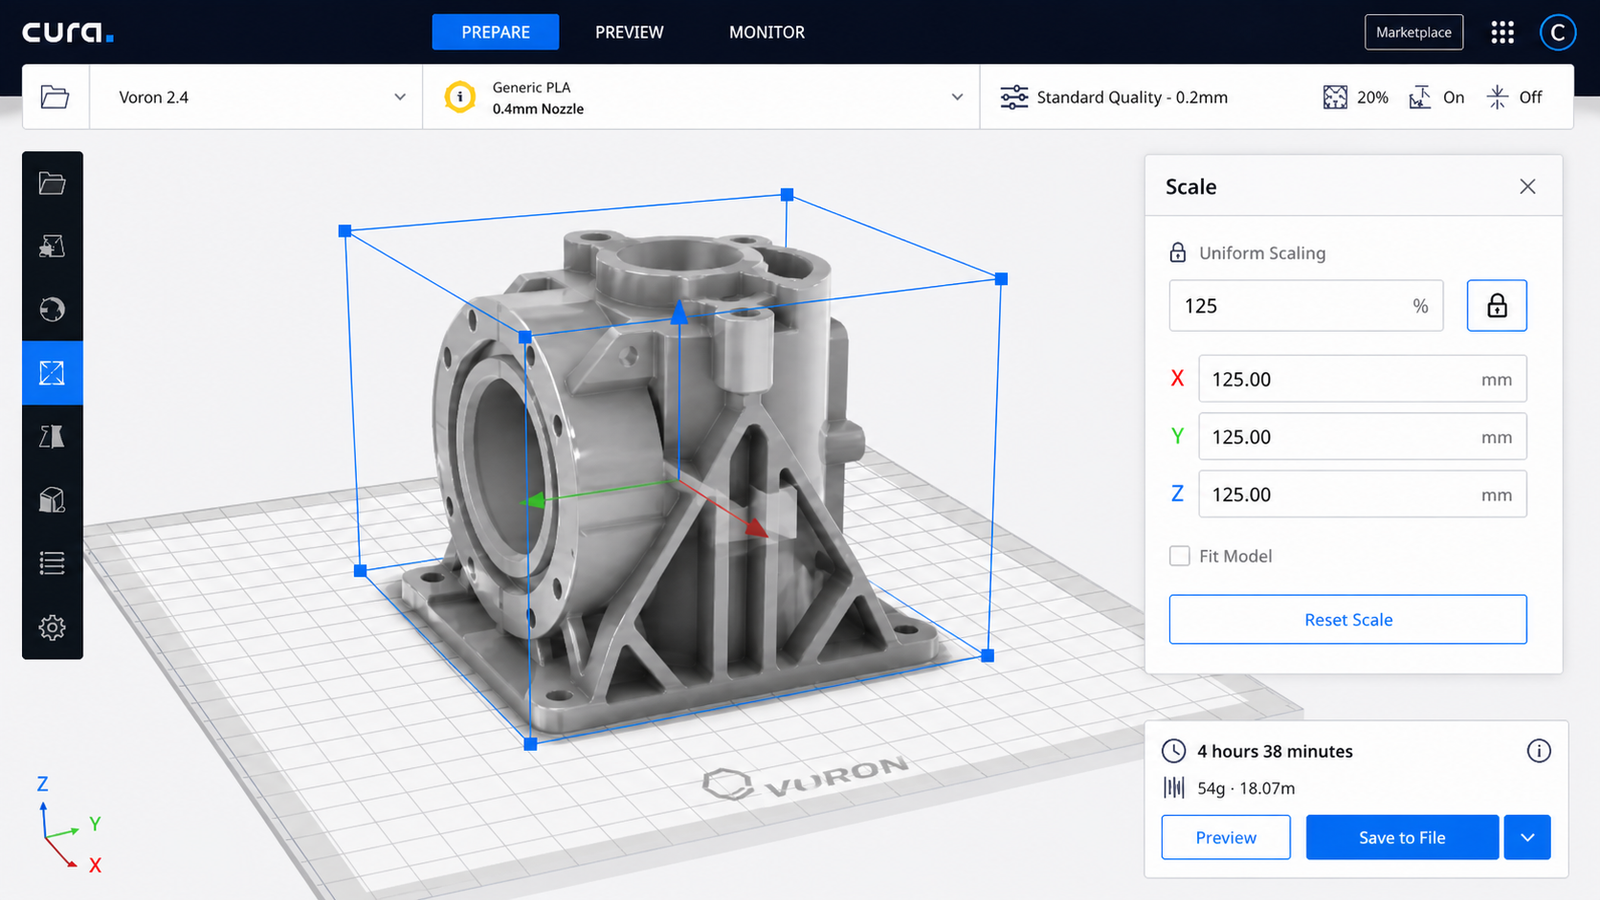
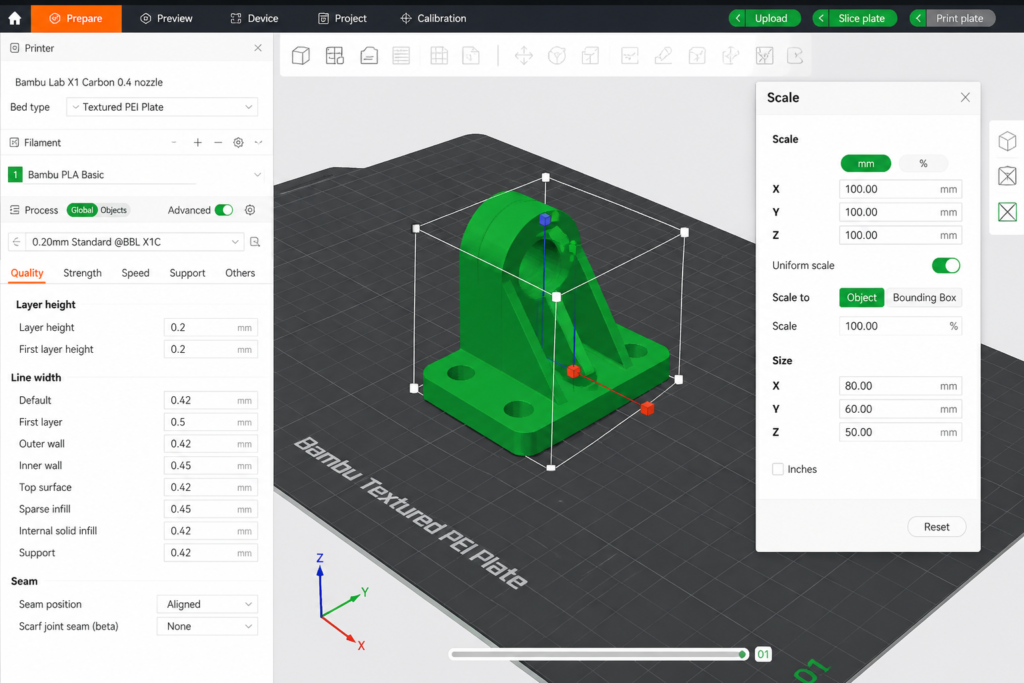
Yes, most slicer programs allow you to scale STL files easily.
Popular slicers such as Bambu Studio, Cura, OrcaSlicer, and PrusaSlicer all include scaling tools. In many cases, this is the fastest and easiest way to resize a model for printing.
Most slicers let you:
For most 3D printing jobs, uniform scaling is the safest option.
Here is the safest workflow for scaling STL files before 3D printing.
Open the STL file in your slicer or CAD software and confirm that it loads properly. Make sure the model orientation and dimensions look reasonable.
Before changing anything, note the current dimensions of the model. This helps you understand how much scaling is needed.
For example, if a part is currently 80 mm wide and needs to be 100 mm wide, you know you need to scale it by 125%.
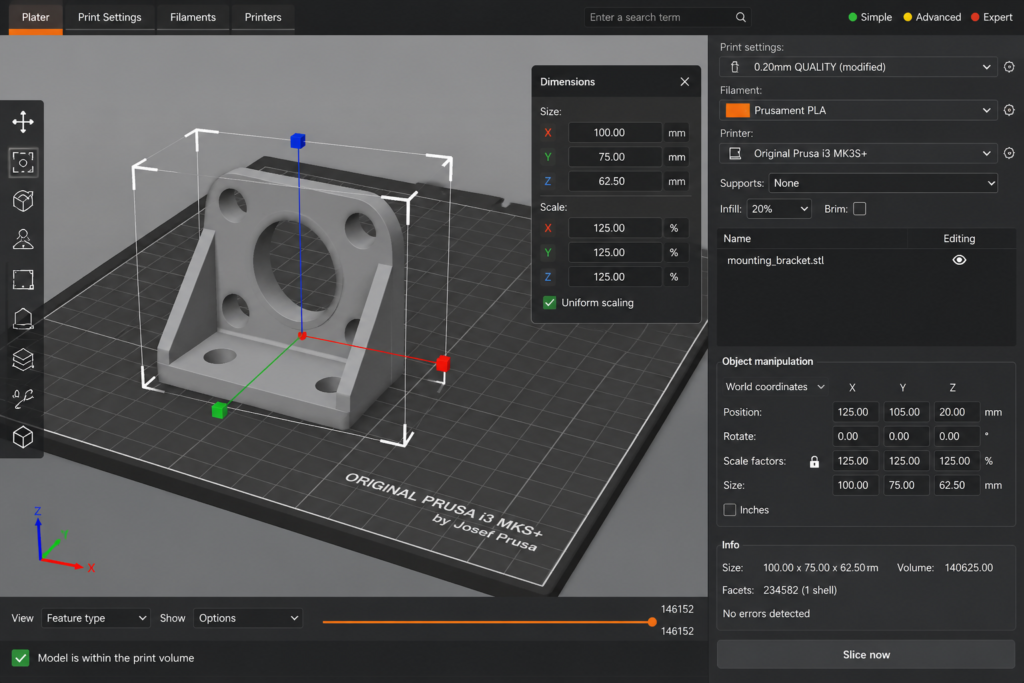
If you want the whole model to stay proportional, use uniform scaling. This changes all axes equally and preserves the shape of the part.
Uniform scaling is usually best for:
For functional parts, scaling by percentage is often less reliable than entering a target size directly.
If the part needs to match a real-world object, always check the exact final dimensions rather than relying only on a percentage value.
Once the model is resized, inspect it again in the slicer. Look for issues such as:
This is especially important when scaling models down.
You may also find this guide useful: How to Check If a Model Is 3D Printable.
Not all scaling works the same way.
Uniform scaling changes the entire model equally in all directions. This keeps the shape correct and is the best option for most prints.
Example:
Non-uniform scaling changes one or more axes separately. This can distort the model and should only be used when there is a specific reason.
Example:
Non-uniform scaling may be useful for:
However, it can easily create problems with symmetry, fit, and strength.
If you know the current size and the target size, the formula is simple:
Target size ÷ current size × 100 = scale percentage
If your model is currently 60 mm long and you need it to be 75 mm long:
75 ÷ 60 × 100 = 125%
So you would scale the model to 125%.
This works for any dimension, as long as you are scaling proportionally.
Scaling is easy in software, but real printing results can still go wrong.
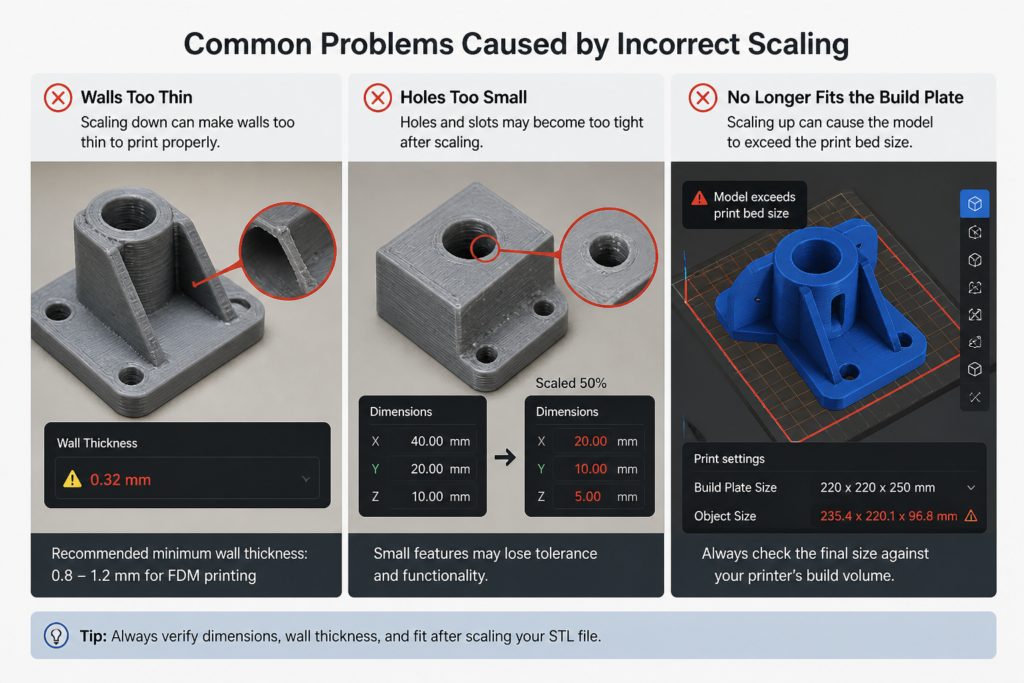
When scaling a model down, walls and fine details may become too thin for FDM or resin printing. A part that looked printable at full size may fail when reduced.
Small holes, slots, and clearance gaps often become less practical after scaling. Even if the model looks correct on screen, the part may no longer fit in real life.
Functional features such as screw threads, snap fits, clips, and press-fit parts often do not scale perfectly in practice. These usually need proper redesign rather than simple resizing.
Scaling up can create another obvious problem: the model may exceed the printable build volume.
Before printing, confirm that the resized part fits your machine or the service limits.
Very small models may lose visible detail, while very large models can reveal low-resolution mesh surfaces more clearly. If that happens, you may need to revisit the original file quality.
You may also want to read (What Resolution Should STL Files Be).
That depends on the type of model.
Use slicer scaling when:
Use CAD software when:
For functional or engineering parts, CAD is usually the safer option.
Do not guess. Measure the real object, space, or fitting point before resizing the model.
After scaling, inspect the model for weak walls or fragile features. This is one of the most common causes of failed or poor-quality prints.
For important parts, printing a small test piece or draft version can save time and material before committing to the final print.
Files from marketplaces, forums, or free model libraries may not be sized correctly for your needs. Always verify dimensions before printing.
If a part needs exact fit, scaling alone may not solve the problem. It may need redesign, tolerance adjustment, or feature correction.
If your STL file is:
then it is worth having the file reviewed before printing.
At 3DRevolution, we help customers check dimensions, prepare files, and produce quality 3D printed parts in the UK. You can upload your model through our instant quote / upload page or learn more about our 3D printing service UK.
Scaling STL files correctly is an important step in 3D printing. A model may look fine on screen, but resizing it without checking thickness, fit, and printability can easily lead to failed prints or unusable parts.
The safest approach is to scale carefully, verify the final dimensions, and inspect the model again before printing. If you are unsure whether your file is correctly sized, 3DRevolution can help you prepare it for production.